Continuous Integration and Deployment Admin settings (FREE SELF)
In this area, you will find settings for Auto DevOps, runners, and job artifacts. You can find it in the Admin Area by navigating to Admin Area > Settings > CI/CD.
Auto DevOps (FREE SELF)
To enable (or disable) Auto DevOps for all projects:
- Go to Admin Area > Settings > CI/CD.
- Check (or uncheck to disable) the box that says Default to Auto DevOps pipeline for all projects.
- Optionally, set up the Auto DevOps base domain which is used for Auto Deploy and Auto Review Apps.
- Hit Save changes for the changes to take effect.
From now on, every existing project and newly created ones that don't have a
.gitlab-ci.yml, uses the Auto DevOps pipelines.
If you want to disable it for a specific project, you can do so in its settings.
Maximum artifacts size (FREE SELF)
The maximum size of the job artifacts can be set at:
- The instance level.
- From GitLab 12.4, the project and group level.
The value is:
- In MB and the default is 100MB per job.
- Set to 1G on GitLab.com.
To change it at the:
-
Instance level:
- Go to Admin Area > Settings > CI/CD.
- Change the value of maximum artifacts size (in MB).
- Click Save changes for the changes to take effect.
-
Group level (this overrides the instance setting):
- Go to the group's Settings > CI/CD > General Pipelines.
- Change the value of maximum artifacts size (in MB).
- Click Save changes for the changes to take effect.
-
Project level (this overrides the instance and group settings):
- Go to the project's Settings > CI/CD > General Pipelines.
- Change the value of maximum artifacts size (in MB).
- Click Save changes for the changes to take effect.
NOTE: The setting at all levels is only available to GitLab administrators.
Default artifacts expiration (FREE SELF)
The default expiration time of the job artifacts
can be set in the Admin Area of your GitLab instance. The syntax of duration is
described in artifacts:expire_in
and the default value is 30 days.
- Go to Admin Area > Settings > CI/CD.
- Change the value of default expiration time.
- Click Save changes for the changes to take effect.
This setting is set per job and can be overridden in
.gitlab-ci.yml.
To disable the expiration, set it to 0. The default unit is in seconds.
NOTE: Any changes to this setting applies to new artifacts only. The expiration time is not be updated for artifacts created before this setting was changed. The administrator may need to manually search for and expire previously-created artifacts, as described in the troubleshooting documentation.
Keep the latest artifacts for all jobs in the latest successful pipelines (CORE ONLY)
Introduced in GitLab Core 13.9.
When enabled (default), the artifacts for the most recent pipeline for a ref are locked against deletion and kept regardless of the expiry time.
When disabled, the latest artifacts for any new successful or fixed pipelines are allowed to expire.
This setting takes precedence over the project level setting. If disabled at the instance level, you cannot enable this per-project.
To disable the setting:
- Go to Admin Area > Settings > CI/CD.
- Expand Continuous Integration and Deployment.
- Clear the Keep the latest artifacts for all jobs in the latest successful pipelines checkbox.
- Click Save changes
When you disable the feature, the latest artifacts do not immediately expire. A new pipeline must run before the latest artifacts can expire and be deleted.
NOTE: All application settings have a customizable cache expiry interval which can delay the settings affect.
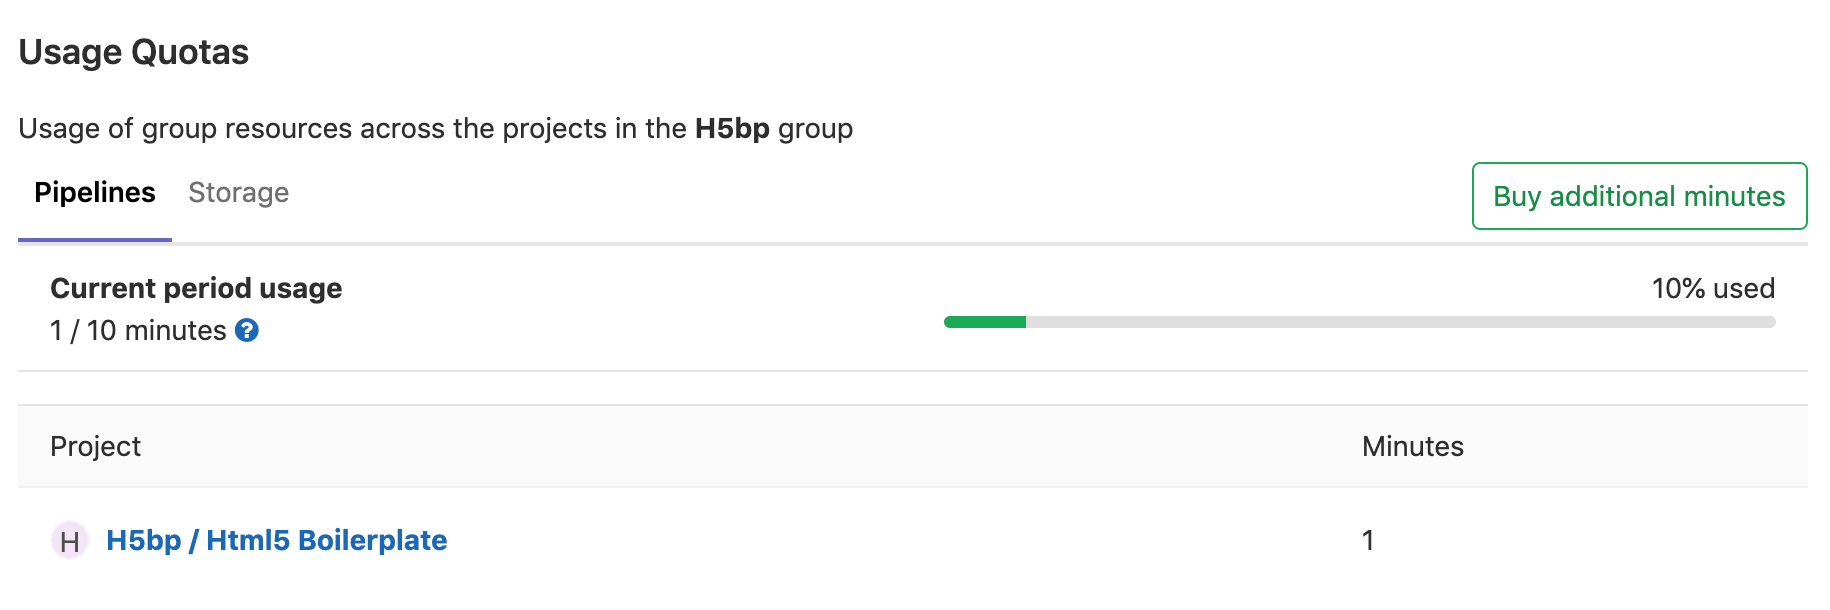
Shared runners pipeline minutes quota (PREMIUM SELF)
Moved to GitLab Premium in 13.9.
If you have enabled shared runners for your GitLab instance, you can limit their
usage by setting a maximum number of pipeline minutes that a group can use on
shared runners per month. Setting this to 0 (default value) grants
unlimited pipeline minutes. While build limits are stored as minutes, the
counting is done in seconds. Usage resets on the first day of each month.
On GitLab.com, the quota is calculated based on your
subscription plan.
To change the pipelines minutes quota:
- Go to Admin Area > Settings > CI/CD.
- Expand Continuous Integration and Deployment.
- In the Pipeline minutes quota box, enter the maximum number of minutes.
- Click Save changes for the changes to take effect.
While the setting in the Admin Area has a global effect, as an admin you can also change each group's pipeline minutes quota to override the global value.
- Navigate to the Admin Area > Overview > Groups and hit the Edit button for the group you wish to change the pipeline minutes quota.
- In the Pipeline Minutes Quota box, enter the maximum number of minutes.
- Click Save changes for the changes to take effect.
Once saved, you can see the build quota in the group admin view. The quota can also be viewed in the project admin view if shared runners are enabled.

You can see an overview of the pipeline minutes quota of all projects of a group in the Usage Quotas page available to the group page settings list.
Archive jobs (FREE SELF)
Archiving jobs is useful for reducing the CI/CD footprint on the system by removing some of the capabilities of the jobs (metadata needed to run the job), but persisting the traces and artifacts for auditing purposes.
To set the duration for which the jobs are considered as old and expired:
- Go to Admin Area > Settings > CI/CD.
- Expand the Continuous Integration and Deployment section.
- Set the value of Archive jobs.
- Hit Save changes for the changes to take effect.
Once that time passes, the jobs are archived and no longer able to be
retried. Make it empty to never expire jobs. It has to be no less than 1 day,
for example: 15 days, 1 month, 2 years.
As of June 22, 2020 the value is set to 3 months on GitLab.com. Jobs created before that date were archived after September 22, 2020.
Default CI configuration path
Introduced in GitLab 12.5.
The default CI configuration file path for new projects can be set in the Admin
Area of your GitLab instance (.gitlab-ci.yml if not set):
- Go to Admin Area > Settings > CI/CD.
- Input the new path in the Default CI configuration path field.
- Hit Save changes for the changes to take effect.
It is also possible to specify a custom CI/CD configuration path for a specific project.
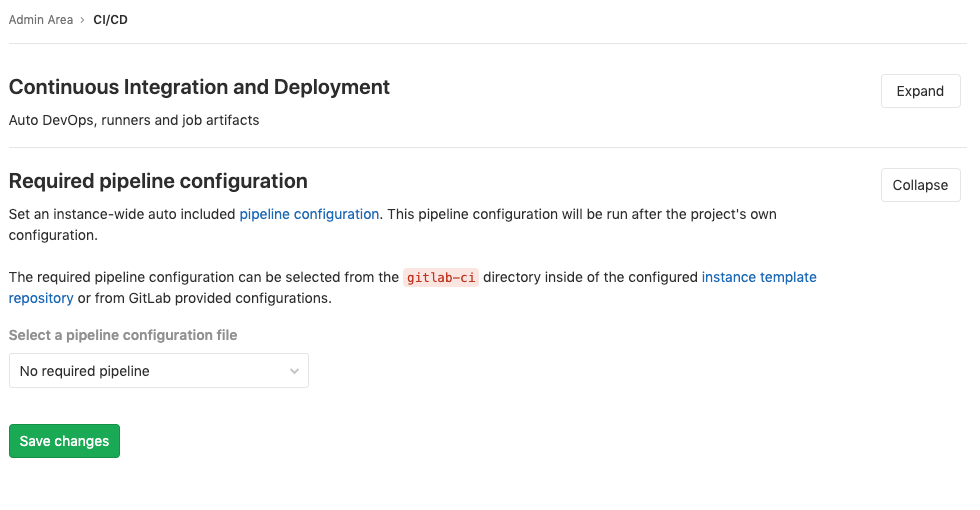
Required pipeline configuration (PREMIUM SELF)
WARNING: This feature is being re-evaluated in favor of a different compliance solution. We recommend that users who haven't yet implemented this feature wait for the new solution.
GitLab administrators can force a pipeline configuration to run on every pipeline.
The configuration applies to all pipelines for a GitLab instance and is sourced from:
- The instance template repository.
- GitLab-supplied configuration.
NOTE:
When you use a configuration defined in an instance template repository,
nested include: keywords
(including include:file, include:local, include:remote, and include:template)
do not work.
To set required pipeline configuration:
- Go to Admin Area > Settings > CI/CD.
- Expand the Required pipeline configuration section.
- Select the required configuration from the provided dropdown.
- Click Save changes.
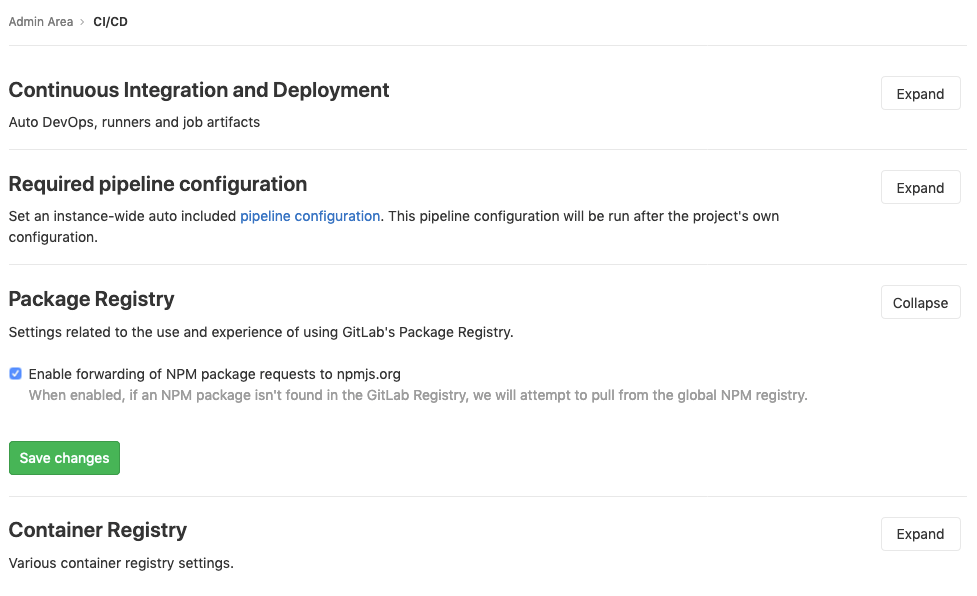
Package Registry configuration
npm Forwarding (PREMIUM SELF)
GitLab administrators can disable the forwarding of npm requests to npmjs.com.
To disable it:
- Go to Admin Area > Settings > CI/CD.
- Expand the Package Registry section.
- Uncheck Enable forwarding of npm package requests to npmjs.org.
- Click Save changes.
Package file size limits
GitLab administrators can adjust the maximum allowed file size for each package type.
To set the maximum file size:
- Go to Admin Area > Settings > CI/CD.
- Expand the Package Registry section.
- Find the package type you would like to adjust.
- Enter the maximum file size, in bytes.
- Click Save size limits.
Troubleshooting
413 Request Entity Too Large
When build jobs fail with the following error, increase the maximum artifacts size.
Uploading artifacts as "archive" to coordinator... too large archive <job-id> responseStatus=413 Request Entity Too Large status=413" at end of a build job on pipeline when trying to store artifacts to <object-storage>.