Getting started with the Web Application Firewall
WARNING: The Web Application Firewall is in its end-of-life process. It is deprecated in GitLab 13.6, and planned for removal in GitLab 14.0.
This is a step-by-step guide to help you use the GitLab Web Application Firewall after deploying a project hosted on GitLab.com to Google Kubernetes Engine using Auto DevOps.
The GitLab native Kubernetes integration is used, so you do not need to create a Kubernetes cluster manually using the Google Cloud Platform console. A simple application is created and deployed based on a GitLab template.
These instructions also work for a self-managed GitLab instance. However, you need to ensure your own runners are configured and Google OAuth is enabled.
The GitLab Web Application Firewall is deployed with Ingress, so it is available to your applications no matter how you deploy them to Kubernetes.
Configuring your Google account
Before creating and connecting your Kubernetes cluster to your GitLab project, you need a Google Cloud Platform account. If you do not already have one, sign up at https://console.cloud.google.com. You need to either sign in with an existing Google account (for example, one that you use to access Gmail, Drive, etc.) or create a new one.
- To enable the required APIs and related services, follow the steps in the "Before you begin" section of the Kubernetes Engine docs.
- Make sure you have created a billing account.
NOTE: Every new Google Cloud Platform (GCP) account receives $300 in credit, and in partnership with Google, GitLab is able to offer an additional $200 for new GCP accounts to get started with the GitLab Google Kubernetes Engine integration. All you have to do is follow this link and apply for credit.
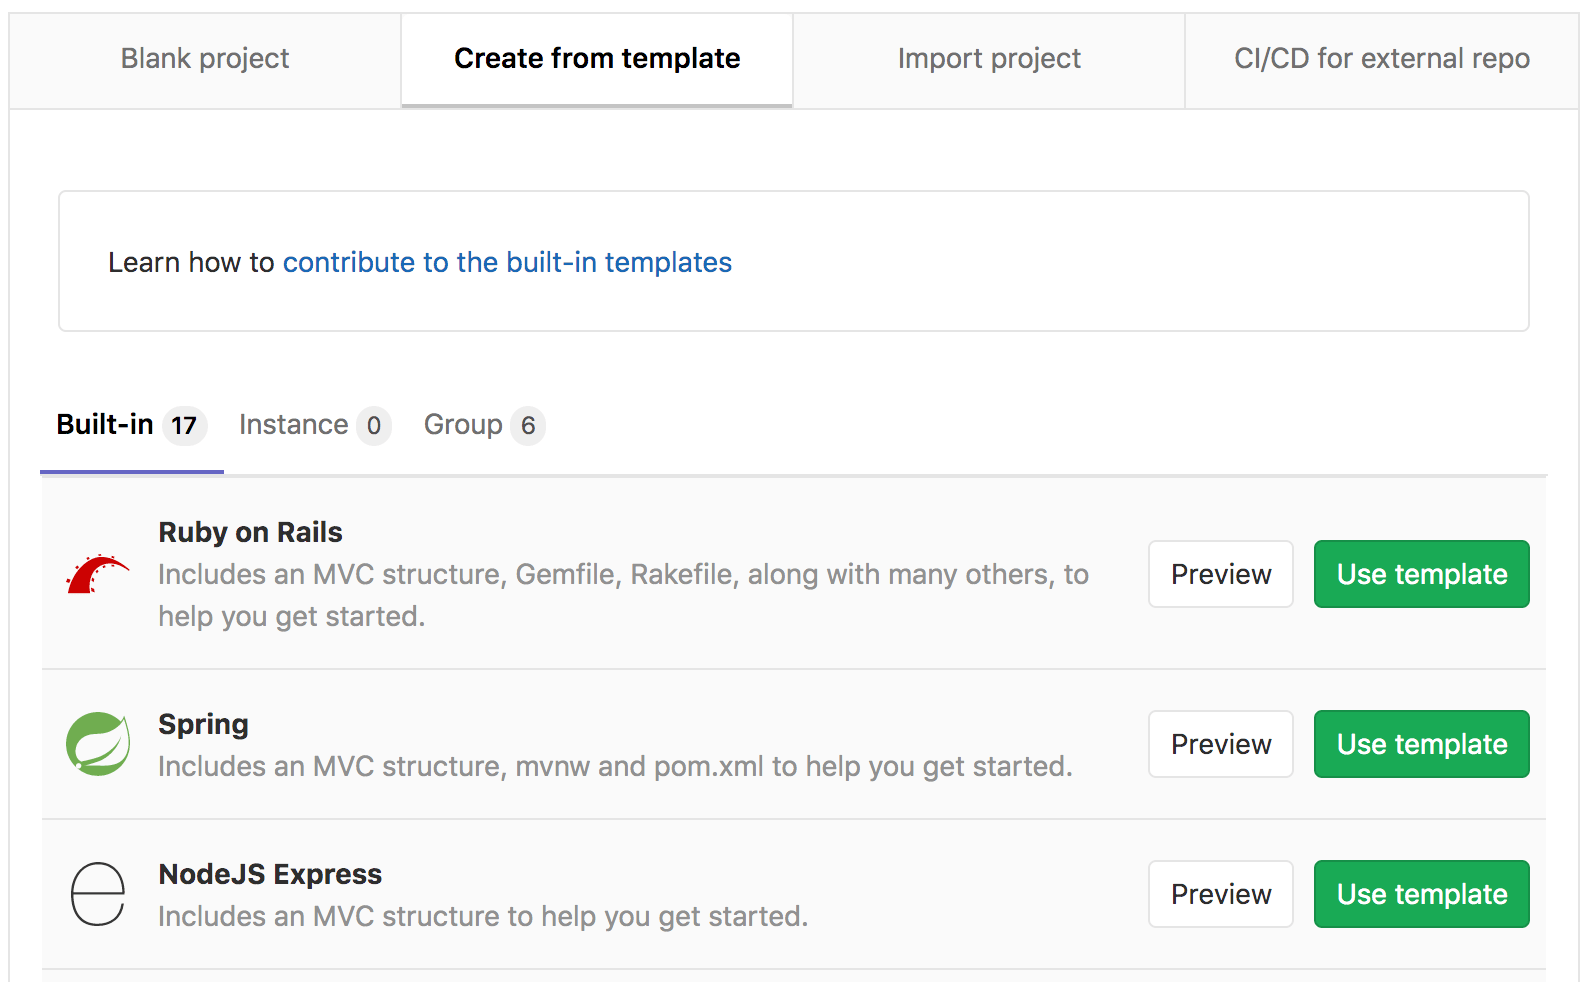
Creating a new project from a template
We use a GitLab project templates to get started. As the name suggests, those projects provide a bare-bones application built on some well-known frameworks.
-
In GitLab, click the plus icon (+) at the top of the navigation bar and select New project.
-
Go to the Create from template tab where you can choose for example a Ruby on Rails, Spring, or NodeJS Express project. Use the Ruby on Rails template.

-
Give your project a name, optionally a description, and make it public so that you can take advantage of the features available in the GitLab Ultimate plan.
-
Click Create project.

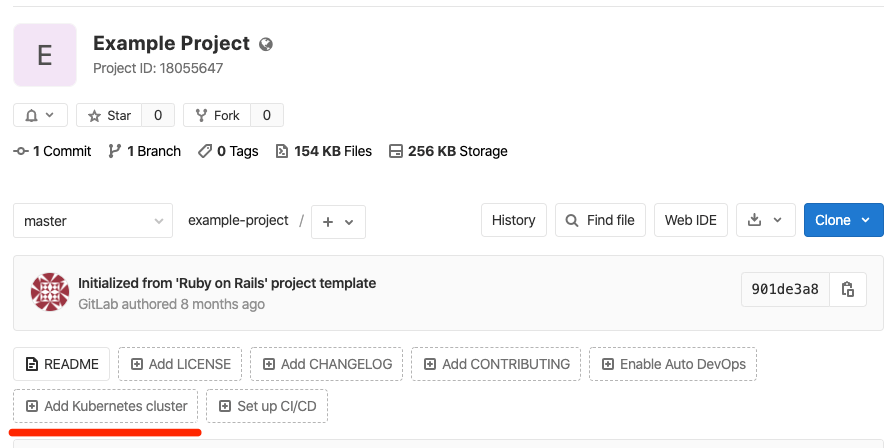
Now that the project is created, the next step is to create the Kubernetes cluster to deploy this application under.
Creating a Kubernetes cluster from within GitLab
-
On the project's landing page, click Add Kubernetes cluster (note that this option is also available when you navigate to Operations > Kubernetes).
-
On the Create new cluster on GKE tab, click Sign in with Google.
-
Connect with your Google account and click Allow when asked (this appears only the first time you connect GitLab with your Google account).
-
The last step is to provide the cluster details.
- Give it a name, leave the environment scope as is, and choose the GCP project under which to create the cluster. (Per the instructions to configure your Google account, a project should have already been created for you.)
- Choose the region/zone to create the cluster in.
- Enter the number of nodes you want it to have.
- Choose the machine type.
-
Click Create Kubernetes cluster.


After a couple of minutes, the cluster is created. You can also see its status on your GCP dashboard.
The next step is to install some applications on your cluster that are needed to take full advantage of Auto DevOps.
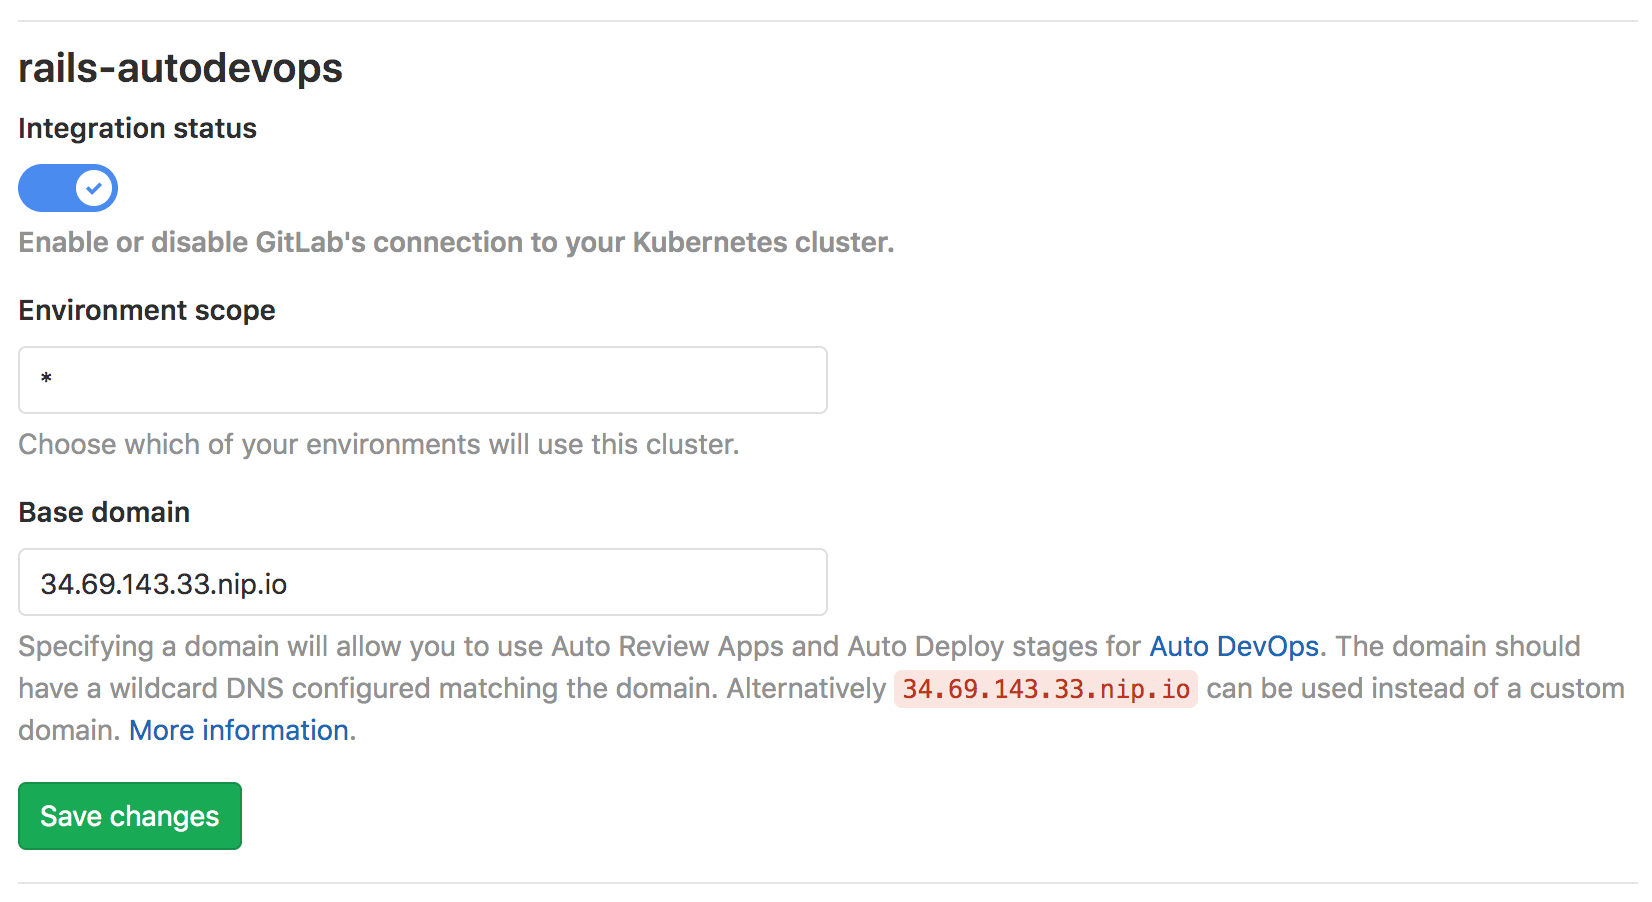
Install Ingress
The GitLab Kubernetes integration comes with some pre-defined applications for you to install.

For this guide, we need to install Ingress. Ingress provides load balancing, SSL termination, and name-based virtual hosting, using NGINX behind the scenes. Make sure to switch the toggle to the enabled position before installing.
Both logging and blocking modes are available for WAF. While logging mode is useful for auditing anomalous traffic, blocking mode ensures the traffic doesn't reach past Ingress.

After Ingress is installed, wait a few seconds and copy the IP address that is displayed in order to add in your base Domain at the top of the page. For the purpose of this guide, we use the one suggested by GitLab. Once you have filled in the domain, click Save changes.
Prometheus should also be installed. It is an open-source monitoring and alerting system that is used to supervise the deployed application. Installing GitLab Runner is not required as we use the shared runners that GitLab.com provides.
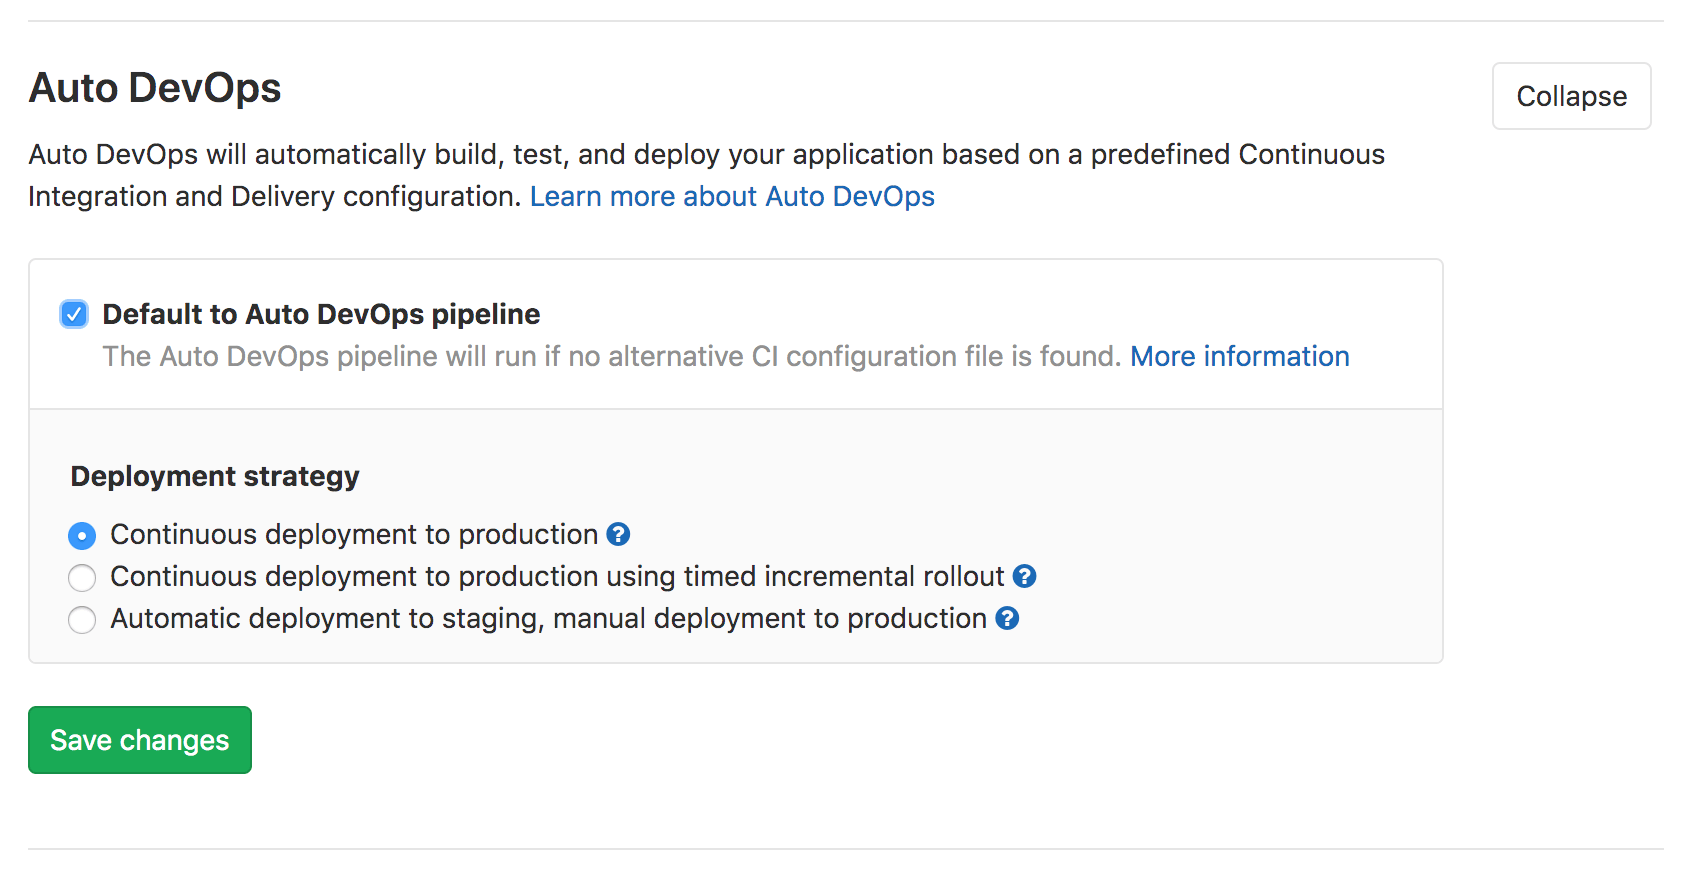
Enabling Auto DevOps (optional)
Starting with GitLab 11.3, Auto DevOps is enabled by default. However, it is possible to disable Auto DevOps at both the instance-level (for self-managed instances) and the group-level. Follow these steps if Auto DevOps has been manually disabled:
-
Navigate to Settings > CI/CD > Auto DevOps.
-
Select Default to Auto DevOps pipeline.
-
Select the continuous deployment strategy which automatically deploys the application to production once the pipeline successfully runs on the
masterbranch. -
Click Save changes.
Once you complete all the above and save your changes, a new pipeline is automatically created. To view the pipeline, go to CI/CD > Pipelines.

The next section explains what each pipeline job does.
Deploying the application
By now you should see the pipeline running, but what is it running exactly?
To navigate inside the pipeline, click its status badge (its status should be "Running"). The pipeline is split into a few stages, each running a couple of jobs.
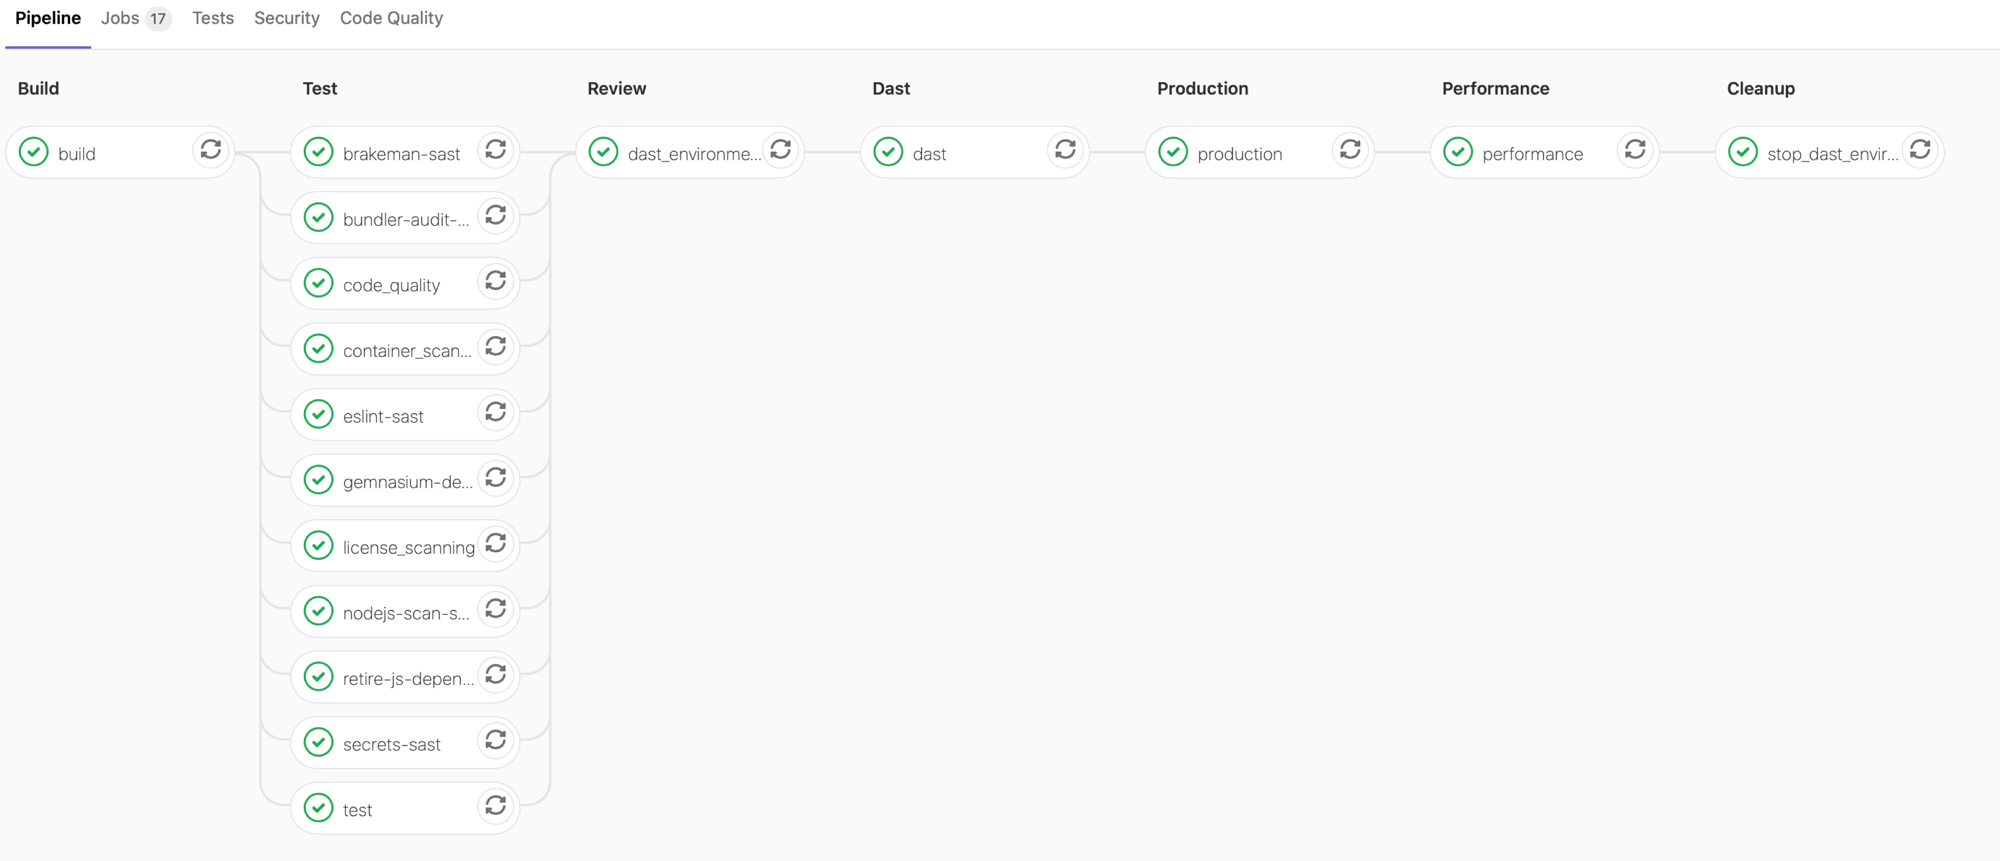
In the build stage, the application is built into a Docker image and then uploaded to your project's Container Registry (Auto Build).
In the test stage, GitLab runs various checks on the application.
The production stage is run after the tests and checks finish, and it automatically deploys the application in Kubernetes (Auto Deploy).
The production stage creates Kubernetes objects like a Deployment, Service, and Ingress resource. The application is monitored by the WAF automatically.
Validating Ingress is running ModSecurity
Now we can make sure that Ingress is running properly with ModSecurity and send a request to ensure our application is responding correctly. You must connect to your cluster either using Cloud Shell or the Google Cloud SDK.
-
After connecting to your cluster, check if the Ingress-NGINX controller is running and ModSecurity is enabled.
This is done by running the following commands:
$ kubectl get pods -n gitlab-managed-apps | grep 'ingress-controller' ingress-nginx-ingress-controller-55f9cf6584-dxljn 2/2 Running $ kubectl -n gitlab-managed-apps exec -it $(kubectl get pods -n gitlab-managed-apps | grep 'ingress-controller' | awk '{print $1}') -- cat /etc/nginx/nginx.conf | grep 'modsecurity on;' modsecurity on; -
Verify the Rails application has been installed properly.
$ kubectl get ns auto-devv-2-16730183-production Active $ kubectl get pods -n auto-devv-2-16730183-production NAME READY STATUS RESTARTS production-5778cfcfcd-nqjcm 1/1 Running 0 production-postgres-6449f8cc98-r7xgg 1/1 Running 0 -
To make sure the Rails application is responding, send a request to it by running:
$ kubectl get ing -n auto-devv-2-16730183-production
NAME  HOSTS  PORTS
production-auto-deploy  fjdiaz-auto-devv-2.34.68.60.207.nip.io,le-16730183.34.68.60.207.nip.io  80, 443

$ curl --location --insecure "fjdiaz-auto-devv-2.34.68.60.207.nip.io" | grep 'Rails!' --after 2 --before 2
<body>
    <p>You're on Rails!</p>
</body>
Now that we have confirmed our system is properly setup, we can go ahead and test the WAF with OWASP CRS!
Testing out the OWASP Core Rule Set
Now let's send a potentially malicious request, as if we were a scanner, checking for vulnerabilities within our application and examine the ModSecurity logs:
$ curl --location --insecure "fjdiaz-auto-devv-2.34.68.60.207.nip.io" --header "User-Agent: absinthe" | grep 'Rails!' --after 2 --before 2
<body>
    <p>You're on Rails!</p>
</body>

$ kubectl -n gitlab-managed-apps exec -it $(kubectl get pods -n gitlab-managed-apps | grep 'ingress-controller' | awk '{print $1}') -- cat /var/log/modsec/audit.log | grep 'absinthe'
{
    "message": "Found User-Agent associated with security scanner",
    "details": {
        "match": "Matched \"Operator `PmFromFile' with parameter `scanners-user-agents.data' against variable `REQUEST_HEADERS:user-agent' (Value: `absinthe' )",
        "reference": "o0,8v84,8t:lowercase",
        "ruleId": "913100",
        "file": "/etc/nginx/owasp-modsecurity-crs/rules/REQUEST-913-SCANNER-DETECTION.conf",
        "lineNumber": "33",
        "data": "Matched Data: absinthe found within REQUEST_HEADERS:user-agent: absinthe",
        "severity": "2",
        "ver": "OWASP_CRS/3.2.0",
        "rev": "",
        "tags": ["application-multi", "language-multi", "platform-multi", "attack-reputation-scanner", "OWASP_CRS", "OWASP_CRS/AUTOMATION/SECURITY_SCANNER", "WASCTC/WASC-21", "OWASP_TOP_10/A7", "PCI/6.5.10"],
        "maturity": "0",
        "accuracy": "0"
    }
}
You can see that ModSecurity logs the suspicious behavior. By sending a request
with the User Agent: absinthe header, which absinthe,
a tool for testing for SQL injections uses, we can detect that someone was
searching for vulnerabilities on our system. Detecting scanners is useful, because we
can learn if someone is trying to exploit our system.
Conclusion
You can now see the benefits of a using a Web Application Firewall. ModSecurity and the OWASP Core Rule Set, offer many more benefits. You can explore them in more detail: